As an Amazon Associate, I earn from qualifying purchases.
If you’ve ever woken up in a wet sleeping bag or found your gear damp from condensation, you know how quickly it can ruin a camping trip. How to stop condensation in a tent is a crucial skill every camper needs to master. Tent condensation not only makes your camping experience uncomfortable but can also lead to equipment damage, mold growth, and less enjoyable future trips. Understanding the causes of condensation is the first step in preventing it and keeping your tent dry.
The good news is that condensation is entirely manageable with the right techniques. By improving ventilation, managing moisture, and choosing the right tent setup, you can stop condensation in its tracks. With these practical tips, you’ll ensure a dry, comfortable camping experience no matter the conditions.
Contents
- 1 Why Condensation Happens in Tents
- 2 How to Stop Condensation in a Tent (Step-by-Step)
- 2.1 Effective Strategies to Minimize Tent Condensation
- 2.2 Step 1: Choose a Well-Ventilated Tent with Mesh Panels
- 2.3 Step 2: Keep Vents and Windows Open, Even in Cold Weather
- 2.4 Step 3: Avoid Cooking or Boiling Water Inside the Tent
- 2.5 Step 4: Store Wet Clothes and Gear Outside the Sleeping Area
- 2.6 Step 5: Use a Breathable Ground Tarp or Footprint
- 2.7 Step 6: Set Up the Tent in a Shaded or Breezy Area
- 2.8 Step 7: Use Moisture Absorbers or Silica Packets Inside the Tent
- 3 Best Gear & Practices to Reduce Tent Condensation
- 4 Extra Tips for Managing Condensation
- 5 How to Stop Tent Fog and Deal with Existing Condensation
- 6 Frequently Asked Questions
Why Condensation Happens in Tents
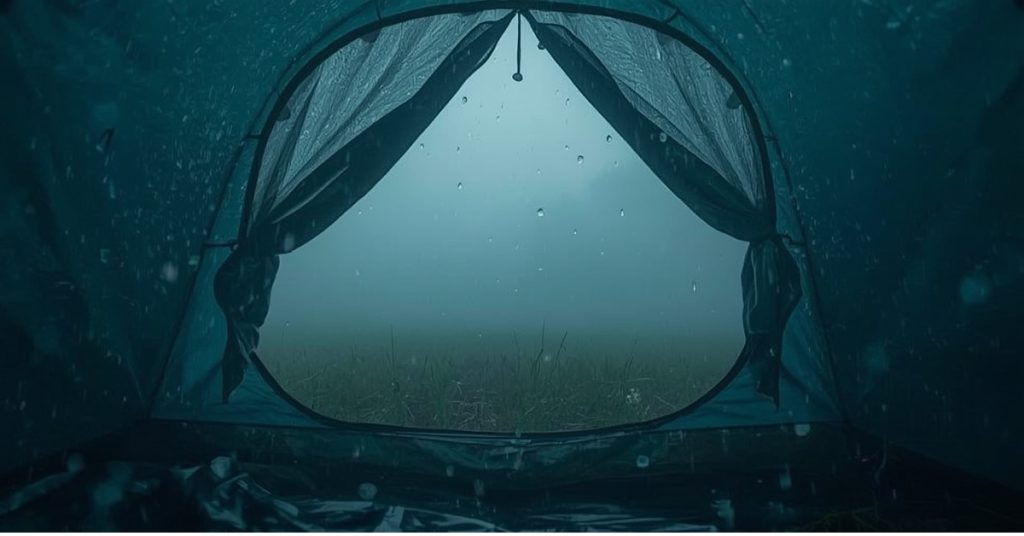
Condensation occurs in tents when warm, moisture-filled air meets cooler surfaces, like the tent walls. This moisture often comes from breathing, sweating, or damp gear. Poor ventilation, high humidity, and temperature differences between inside and outside trap this moisture, creating wet conditions that can damage your gear and ruin your comfort. Understanding the science of condensation allows campers to take proactive steps, ensuring a dry, comfortable, and protected camping experience.
The Perfect Storm of Moisture
Your breath alone releases approximately one pint of water vapor during eight hours of sleep. Add wet clothing, damp gear, and body heat, and you’ve created a humid microclimate inside your tent. When this warm, moist air hits the cooler tent walls or rainfly, it condenses into water droplets.
Several factors contribute to this moisture buildup:
Temperature Differentials: The greater the temperature difference between inside and outside your tent, the more likely condensation becomes. Cool evening air meeting your body heat creates ideal conditions for moisture formation.
Poor Air Circulation: Sealed tents with minimal ventilation trap humid air, preventing moisture from escaping. Without proper airflow, water vapor has nowhere to go except onto your tent surfaces.
Weather Conditions: High humidity, rain, and sudden temperature drops all increase condensation risk. Camping near water sources or in valleys where cool air settles can exacerbate the problem.
Human Activity: Breathing, sweating, and bringing wet items inside your tent continuously adds moisture to the enclosed space. Even seemingly dry items like clothes can release stored moisture when warmed.
How to Stop Condensation in a Tent (Step-by-Step)
To minimize condensation, choose a well-ventilated tent with mesh panels and keep vents open, even in cold weather. Avoid cooking inside, store wet gear outside, and use a breathable ground tarp. Set up in shaded, breezy spots and use moisture absorbers for longer trips. These steps, combined with the right gear, will help ensure a dry and comfortable camping experience.
Effective Strategies to Minimize Tent Condensation
Condensation in tents can be a major issue, but with the right approach, it can be minimized for a dry, comfortable camping experience. Focus on proper ventilation by opening vents, using rainflies effectively, and setting up in elevated, dry areas. Keep wet gear outside to reduce moisture inside, and manage humidity from human activity. These strategies target the root causes of condensation, ensuring a more enjoyable camping experience. By choosing the right tent, employing smart camping practices, and managing gear, you can eliminate condensation and enhance your outdoor adventure.
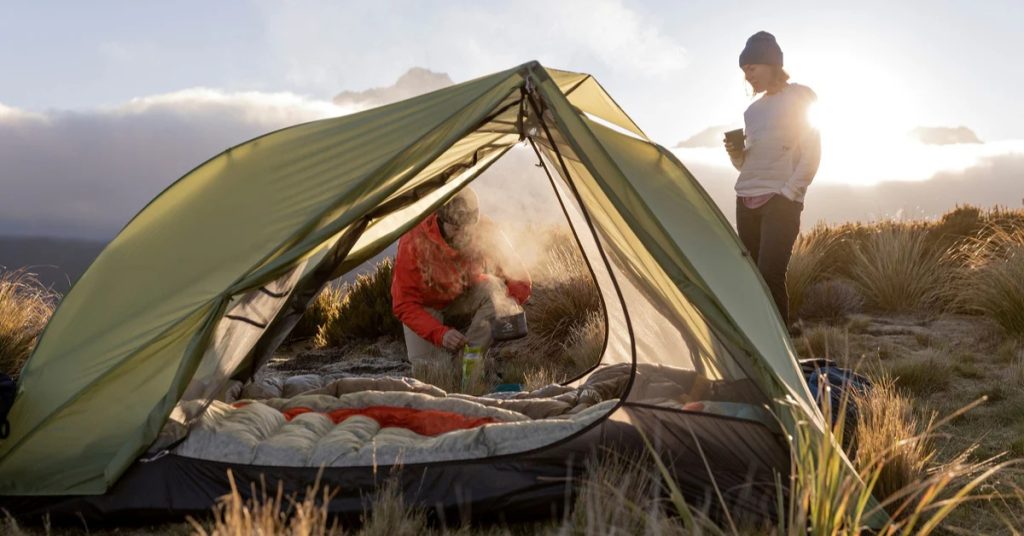
Step 1: Choose a Well-Ventilated Tent with Mesh Panels
Your tent choice significantly impacts condensation levels. Look for tents featuring:
- Multiple mesh panels for cross-ventilation
- Adjustable vents near the floor and roof
- Double-wall construction with a separate rainfly
- Vestibules for storing wet gear outside the sleeping area
Single-wall tents, while lighter, are more prone to condensation because they lack the air gap that double-wall designs provide. The space between the tent body and rainfly allows air circulation while maintaining weather protection.
Step 2: Keep Vents and Windows Open, Even in Cold Weather
Proper ventilation is your most powerful tool for preventing condensation in camping tents. Keep tent vents partially open throughout the night, even during cold weather. The slight temperature drop inside is far preferable to waking up in a moisture-soaked tent.
Position vents strategically:
- Open low vents for cool air intake
- Keep high vents open for warm, humid air exhaust
- Create cross-ventilation by opening vents on opposite sides
Don’t worry about losing too much heat—the moisture reduction benefits far outweigh the minimal temperature decrease.
Step 3: Avoid Cooking or Boiling Water Inside the Tent
Cooking activities release enormous amounts of steam and moisture into your tent’s enclosed space. A single cup of boiling water can add several ounces of water vapor to the air. Instead:
- Cook in your tent’s vestibule or outside
- Use a tarp shelter for cooking in bad weather
- If you must cook inside, maximize ventilation first
- Allow steam to dissipate before sealing the tent
This simple change alone can eliminate a major source of tent moisture.
Step 4: Store Wet Clothes and Gear Outside the Sleeping Area
Wet items continuously release moisture as they dry, contributing to dampness in your tent. Create a moisture management system:
- Hang wet clothes in the vestibule or outside
- Store damp gear in waterproof stuff sacks
- Change into dry clothes before entering your sleeping area
- Use absorbent towels to remove excess moisture before bringing items inside
If you must store wet items inside due to security concerns, place them as far from your sleeping area as possible and ensure maximum ventilation.
Step 5: Use a Breathable Ground Tarp or Footprint
Ground moisture can contribute to overall tent humidity through evaporation. A proper footprint or ground tarp creates a barrier while allowing some breathability:
- Choose footprints sized smaller than your tent floor
- Avoid plastic tarps that trap ground moisture
- Select breathable materials like Tyvek or purpose-built footprints
- Ensure edges don’t extend beyond your tent to prevent water collection
Step 6: Set Up the Tent in a Shaded or Breezy Area
Campsite selection plays a crucial role in moisture management. Choose locations that promote airflow and minimize moisture accumulation:
- Avoid valleys and low-lying areas where cool air settles
- Camp away from water sources that increase local humidity
- Select sites with natural wind breaks that don’t completely block airflow
- Position your tent to take advantage of prevailing breezes
Higher elevation campsites often have better air circulation and lower humidity levels.
Step 7: Use Moisture Absorbers or Silica Packets Inside the Tent
For extended trips or particularly humid conditions, commercial moisture absorbers can help maintain dry conditions inside your tent. Options include:
- Rechargeable silica gel packets
- DampRid or similar moisture-absorbing crystals
- Small battery-powered dehumidifiers for car camping
- Cedar blocks or activated charcoal for natural moisture absorption
Place these strategically around your tent, but ensure they’re secured to prevent spills during the night.
Best Gear & Practices to Reduce Tent Condensation
Investing in the right equipment and developing good camping habits will help you prevent condensation in camping tents more effectively than any single technique.
Essential Gear for Moisture Management
Tents with Superior Ventilation: Look for models with multiple vent positions, mesh panels, and adjustment systems that allow fine-tuning of airflow. Brands like Big Agnes, Nemo, and MSR design tents specifically with condensation prevention in mind.
Breathable Sleeping Systems: Moisture-wicking sleeping bag liners, breathable sleeping pads, and synthetic insulation all help manage moisture around your sleeping area. Down insulation, while warmer, retains moisture more readily than synthetic alternatives.
Quick-Dry Towels and Cloths: Lightweight, absorbent towels help you manage moisture before it becomes a problem. Pack-towels or chamois-style cloths can quickly wipe down tent walls and gear.
Waterproof Storage Solutions: Dry bags and waterproof stuff sacks keep wet items contained while allowing you to organize gear by moisture level.
Smart Camping Practices
Develop routines that minimize moisture introduction:
- Change clothes outside your tent when possible
- Wipe down wet gear before bringing it inside
- Air out your sleeping bag and tent daily
- Pack moisture-prone items separately
Extra Tips for Managing Condensation

Keep your tent dry by ventilating with vents or mesh panels, storing wet gear outside, and using waterproof bags. Pitch on high ground, use a footprint, and avoid cooking or drying clothes inside. These simple steps cut down moisture and keep your tent comfortable.
These advanced techniques can help eliminate tent condensation in challenging conditions:
Daily Tent Maintenance
Air out your tent whenever possible. Even 15-30 minutes of open-air exposure can significantly reduce accumulated moisture. During multi-day trips, take down your tent completely if weather permits, allowing all surfaces to dry thoroughly.
Temperature Management
Avoid over-insulating your tent, which traps moisture along with heat. Instead of adding extra insulation to your tent, focus on insulating your body with appropriate sleeping gear. This approach maintains comfort while allowing moisture to escape.
Powered Solutions for Car Camping
Small battery-powered fans can create artificial airflow in still conditions. These compact devices consume minimal power while providing significant ventilation benefits. Position fans to create cross-ventilation patterns within your tent.
Strategic Campsite Selection
Choose campsites that work with natural airflow patterns. Avoid camping directly next to lakes, rivers, or other water sources that increase local humidity. Similarly, dense vegetation can trap moisture and reduce air circulation.
How to Stop Tent Fog and Deal with Existing Condensation
mold growth. To tackle it, wipe down tent walls with absorbent cloths, increase ventilation, and remove damp items. Allow all gear to air dry before packing, and never store a wet tent for long periods to avoid material damage. By acting quickly, you can prevent condensation from damaging your equipment and ensure a dry, comfortable camping experience.
Wrapping up
Condensation doesn’t have to dampen your outdoor adventures. By combining the right gear, smart camping practices, and proactive moisture management, you can enjoy dry, comfortable nights no matter the weather. Focus on ventilation, control moisture sources, and plan ahead to protect both yourself and your investment in quality camping equipment. With these strategies, every trip becomes more enjoyable—and your gear lasts longer. Start now by assessing your tent’s ventilation and implementing a moisture management plan for your next adventure.
Frequently Asked Questions
Is condensation the same as a leak?
No, condensation forms on the inside surfaces of your tent, while leaks allow water to enter from outside. Condensation appears as small droplets on walls and ceilings, forming gradually and feeling cool to the touch. Leaks create wet spots or dripping from specific points and usually appear suddenly and feel cold.
Can condensation damage my tent?
Yes, persistent condensation can harm your tent over time. It encourages mold and mildew growth, weakens fabric coatings, and can cause zippers to fail. Condensation can also damage gear, sleeping bags, and electronics. Proper ventilation and moisture management are essential to protect both your tent and equipment.
How do I dry out a tent after heavy condensation?
Remove all wet items immediately and increase airflow through the tent. Wipe down surfaces with absorbent towels, then allow maximum ventilation. If possible, take the tent down and hang it in a breezy area. For stubborn dampness, set it up at home and use fans to speed up drying. Never store a damp tent, as this leads to mold and odor issues.
Will a rainfly increase condensation?
A properly designed rainfly reduces condensation by creating an air gap between the tent body and exterior. Condensation occurs if the rainfly is too close to the tent or lacks proper ventilation. Ensure your rainfly has sufficient clearance and vents to prevent trapped moisture.
Are certain tent materials better at preventing condensation?
Yes, breathable fabrics like ripstop nylon with appropriate coatings provide the best balance of weather protection and moisture management. Single-wall materials like silnylon can increase condensation because they limit airflow. Tents with breathable bodies combined with waterproof rainflies offer optimal condensation control and comfort.
As an Amazon Associate, I earn from qualifying purchases.