As an Amazon Associate, I earn from qualifying purchases.
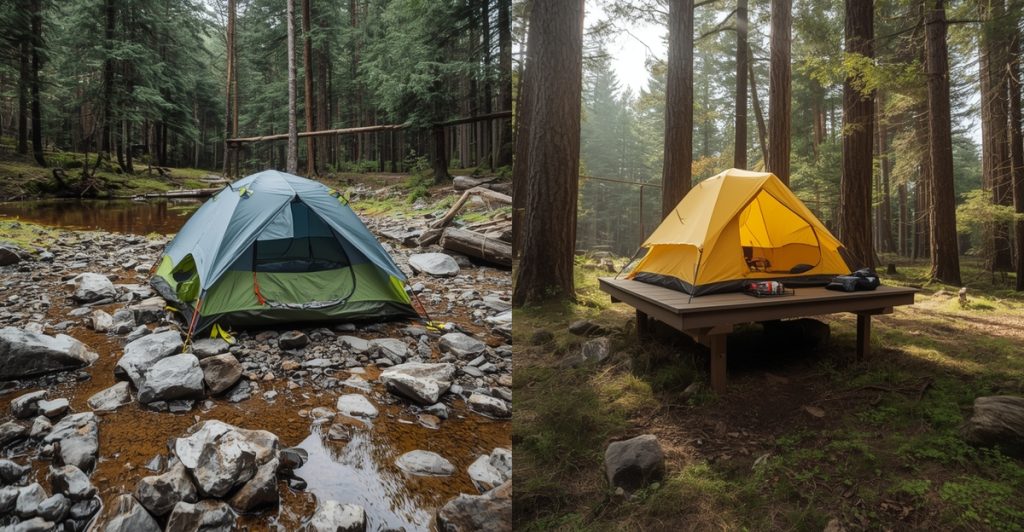
A successful camping trip often comes down to the details. You can have the best gear and the perfect location, but if you spend the night tossing and turning on lumpy, uneven ground, the experience can quickly turn sour. This is where a tent platform comes in. Building a solid, level base for your tent can transform your outdoor adventure, providing a level of comfort and protection that the natural ground simply can’t match.
A tent platform elevates your shelter, keeping you dry during downpours and away from crawling insects. It provides a flat, stable surface that guarantees a better night’s sleep, free from rocks and roots digging into your back. Whether you’re setting up a semi-permanent campsite or creating a glamping oasis in your backyard, learning how to build a tent platform is a game-changer. This guide will walk you through everything you need to know, from selecting the right materials to constructing a durable base that will last for years.
Contents
Why You Need a Tent Platform
Camping directly on the ground may be traditional, but it often comes with challenges like uneven terrain, damp soil, and pests. A well-constructed tent platform solves these issues, offering major benefits that improve your camping experience. The primary advantage of building a tent platform is enhanced comfort. Elevating your tent provides a flat, stable surface, eliminating the discomfort of sleeping on uneven ground, so you wake up refreshed and ready for the day. It also simplifies tent setup and organizing your gear.
A platform also offers vital protection from the elements. It raises your tent above moisture, mud, and morning dew, preventing water from seeping through the floor. Elevation improves airflow beneath the tent, reducing condensation and regulating internal temperature for a more comfortable night’s sleep. Additionally, a tent platform protects your gear. It shields the tent floor from rocks, sticks, and abrasives, reducing the risk of damage and extending the life of your equipment, saving you money in the long run.
For those setting up extended base camps, learning how to build a tent platform is a game changer. It provides superior comfort, protection, and durability, making it an essential part of any outdoor adventure. Whether for short trips or longer stays, a solid platform ensures your gear lasts longer, your tent stays dry, and your camping experience is more enjoyable.
How to Build a Tent Platform: Step-by-Step Guide
Building your own DIY tent platform is a rewarding project that can be completed in a weekend. This step-by-step tent platform construction guide breaks down the process into manageable steps. For this example, we will build a standard wooden platform, a common size for many family-sized tents.
Step 1: Prepare the Site
Before you begin building your tent platform, it’s essential to plan carefully and gather all necessary materials. A sturdy and well-constructed platform enhances your camping experience by providing a level, dry, and stable surface for your tent, ensuring comfort and longevity throughout your outdoor adventure.
First, choose the location for your platform. Look for a spot that is relatively level and has good drainage.
- Clear the Area: Remove any rocks, roots, branches, and vegetation from the ground where the platform will sit. You want the surface to be as clear as possible.
- Level the Ground: Use a shovel and rake to level the area. You don’t need it to be perfect, as you can make adjustments with the support blocks, but getting it close will make the rest of the process easier. Place a long, straight board with a level on top to check your work.
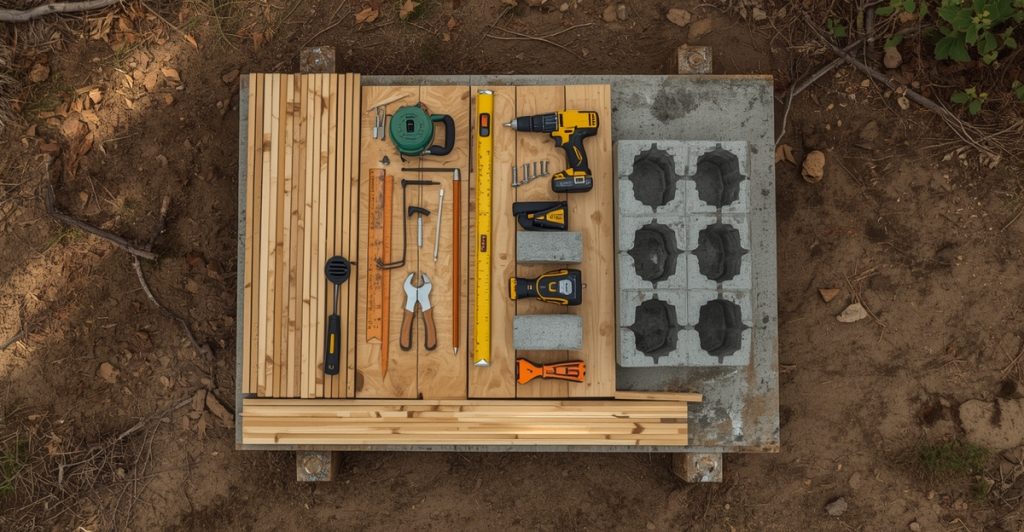
Step 2: Measure and Cut Your Materials
Accurate measurements are crucial for a sturdy frame. Suppose For a 10×12 foot platform, you will need pressure-treated lumber to resist rot and insects.
- Frame: You will need two 12-foot boards and two 9-foot 9-inch boards (using 2×6 lumber). The shorter boards account for the 1.5-inch thickness of the longer boards on each side (10 feet = 120 inches; 120 – 1.5 – 1.5 = 117 inches, or 9 feet 9 inches).
- Joists: You will need nine 9-foot 9-inch boards for the interior joists. These will be spaced 16 inches apart on center to provide adequate support for the decking.
- Decking: You will use 5/4-inch or 2×6 deck boards to cover the surface. For a 12-foot length, you’ll need approximately 24 10-foot boards.
Step 3: Assemble the Platform Frame
Building a sturdy deck platform requires careful planning, precise measurements, and high-quality materials. By following these steps, you can ensure a durable and safe structure that will serve as an ideal outdoor space for years to come.
With your materials cut, it’s time to build the outer frame.
- Lay Out the Frame: Arrange your two 12-foot boards and two 9-foot 9-inch boards in a rectangle on your prepared site.
- Secure the Corners: Ensure the corners are square using a framing square. Drive three-inch deck screws through the ends of the 12-foot boards into the ends of the shorter boards to join them.
Step 4: Add Support and Install Joists
Adding proper support and installing joists are critical steps to ensure the stability and durability of your structure. By carefully placing and securing these components, you create a solid foundation that can handle weight and withstand environmental pressures over time.
The frame now needs internal support to hold the decking.
- Place Support Blocks: Position concrete deck blocks under each corner of the frame. Use a level to ensure the frame is perfectly horizontal, adding or removing soil under the blocks as needed. Add additional blocks every 4-6 feet along the perimeter for extra stability.
- Install Joists: Mark the inside of the 12-foot frame boards every 16 inches. These marks indicate where the center of each joist will go. Use joist hangers for a secure connection. Nail the hangers into place, then set the joists into the hangers and secure them with screws or nails.
Step 5: Install the Platform Surface
The platform surface is the final and most visible component of your project, providing the foundation for daily use. A well-installed surface not only enhances durability but also ensures safety and aesthetic appeal, making it a crucial step in the construction process.
The final step is to add the decking.
- Lay the Deck Boards: Start at one end of the frame, laying your first 10-foot deck board flush with the edge.
- Secure the Boards: Fasten the deck board to each joist using two deck screws.
- Continue Across: Place the next board, leaving a small gap (about the width of a nail) between it and the first board to allow for drainage and wood expansion. Continue this process across the entire frame until the surface is covered. Your final board may need to be ripped to fit.
Best Materials for Tent Platforms
Choosing the right material is a critical part of your tent platform construction. Your choice will impact durability, cost, and portability.
Pressure-Treated Wood
- Pros: This is the most popular choice for a reason. It’s highly resistant to rot, insects, and moisture, making it ideal for a long-lasting outdoor structure. It’s also strong, widely available, and relatively affordable.
- Cons: Pressure-treated wood is heavy, making it unsuitable for a portable platform. It also contains chemicals, so it’s wise to wear gloves and a mask when cutting it.
Plywood
- Pros: A sheet of thick, exterior-grade plywood can serve as a simple and quick platform surface. It provides a smooth, solid base.
- Cons: Plywood is susceptible to water damage and can delaminate if not properly sealed and maintained. It’s best used as a surface material on top of a sturdy frame rather than as the frame itself.
Composite Decking
- Pros: Made from a mix of wood fibers and recycled plastic, composite decking is extremely durable and low-maintenance. It won’t rot, warp, or splinter, and it comes in various colors.
- Cons: The main drawback is cost. Composite decking is significantly more expensive than pressure-treated wood. It is also quite heavy.
Pallets
- Pros: For a quick and cheap DIY tent platform, wooden pallets can be an effective solution. They are often available for free and provide instant elevation.
- Cons: Pallets are not designed for consistent structural support. They can be uneven, have wide gaps, and may have been treated with unknown chemicals. They are a good temporary fix but not a reliable long-term solution.
DIY vs. Pre-Made Tent Platforms
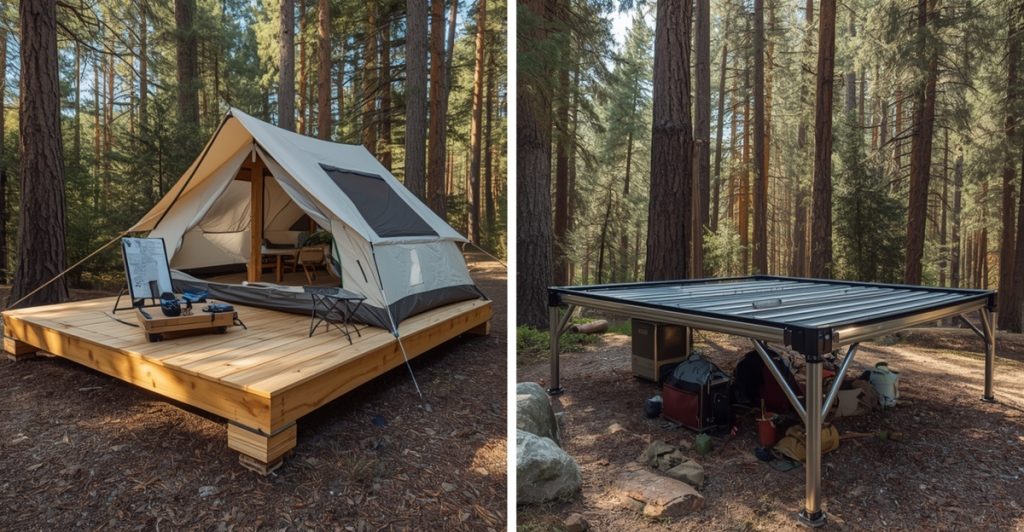
Choosing between a DIY and pre-made tent platform depends on your specific needs, budget, and skill level. While DIY platforms allow for customization and cost savings, pre-made options provide convenience, durability, and professional craftsmanship. Assess your priorities to determine which approach aligns best with your camping setup and long-term plans.
When deciding on a platform tent setup, you have two main options: build it yourself or buy a pre-made kit.
A DIY tent platform offers complete customization. You can build it to the exact dimensions of your tent and tailor the design to your specific needs and location. Building it yourself is often more cost-effective, especially if you have access to basic tools and materials. The process itself is also a satisfying project that gives you a deeper connection to your campsite.
Pre-made tent platforms, on the other hand, offer convenience. These kits come with all the necessary components and instructions, saving you the time of measuring and cutting. Some are designed for portability, with modular pieces that can be assembled and disassembled easily. However, they are generally more expensive and offer less flexibility in size and design.
How to Ensure Your Tent Platform Lasts Longer

A wooden tent platform is an investment, and with proper care, it can last for many years.
- Use Quality Materials: Start with pressure-treated or naturally rot-resistant wood like cedar or redwood.
- Apply a Sealant: Even with pressure-treated wood, applying a water-repellent sealant every year or two will add an extra layer of protection against moisture.
- Ensure Good Drainage: Make sure water can drain away from and under the platform. The small gaps between deck boards will help, as will a site with a slight slope.
- Keep it Clean: Regularly sweep off leaves, dirt, and other debris. This prevents moisture from being trapped against the wood, which can lead to rot.
- Inspect Regularly: At the beginning of each camping season, check for any signs of rot, loose boards, or wobbly supports, and make repairs as needed.
Combining Tent Platforms with Camper Van Adventures
While learning how to build a tent platform is essential for traditional camping, many outdoor enthusiasts also combine tent camping with camper vans for expanded basecamp setups. For those interested in hybrid camping approaches, check out our guide on tent site camping with a camper van for essential tips and gear recommendations. Whether for solo tent camping or larger operations, the platform construction principles remain the same
Wrapping Up…
Building a tent platform is more than just a construction project; it’s an upgrade to your entire camping lifestyle. By providing a stable, dry, and comfortable foundation, you ensure that every outdoor trip is more enjoyable and restful. You’ll sleep better, protect your gear, and create a more inviting and functional campsite. With the steps and tips in this guide, you have all the information you need to build a durable and reliable platform for your tent.
Frequently Asked Questions (FAQs)
What’s the best material to use for a tent platform?
Pressure-treated wood is the top choice for durability, rot resistance, and affordability, making it ideal for long-term outdoor setups.
How do I build a tent platform on uneven ground?
Set the frame on adjustable pier or deck blocks, then level by adding/removing soil or using shims to keep the platform stable.
How high should a tent platform be off the ground?
Around 6–12 inches provides airflow, keeps moisture away, and ensures easy access without making it too tall.
Can I make a portable tent platform?
Yes, by building lighter sections that bolt together. This design makes setup and takedown faster for mobile campers.
How do I prevent my tent platform from rotting?
Choose rot-resistant wood, apply water-repellent sealant every couple of years, and maintain good drainage and airflow.
Can I build a tent platform without special tools?
Absolutely. A circular saw, drill, level, tape measure, and framing square are enough for most DIY projects.
How long does it take to build a tent platform, and can it be disassembled?
Beginners may need a weekend, while pros finish in a day. Use screws for easy disassembly; nails make it harder.
As an Amazon Associate, I earn from qualifying purchases.