As an Amazon Associate, I earn from qualifying purchases.
Even the highest-quality tent can develop leaks if its seams aren’t properly sealed. While most manufacturers apply basic seam treatment during production, this factory sealing can wear down over time or may not provide complete waterproof protection from the start. Learning how to Seam Seal a Tent is essential to keep your gear dry and reliable in wet conditions.
Seam sealing creates a barrier that prevents water from penetrating through stitching holes, keeping your tent dry during heavy rain or wet conditions. This essential maintenance task can mean the difference between a comfortable night’s sleep and waking up in a puddle.
Whether you’re gearing up for your next camping trip or maintaining an older tent, this guide covers everything from why seam sealing matters to performing it with professional results.
Contents
Why Seam Sealing a Tent Is Important
Seam sealing is essential to keep your tent waterproof and durable. Stitched seams are vulnerable to leaks, and applying a sealant protects your gear, extends tent life, and ensures dry, comfortable camping even in wet conditions.
1. Factory Seams Aren’t Fully Waterproof
Most tent manufacturers apply seam tape or basic sealing during production, but this treatment is often minimal. Budget and mid-range tents frequently receive only partial seam sealing, leaving critical areas vulnerable to water intrusion. Even premium tents may have seams that degrade over time due to UV exposure, temperature fluctuations, and general wear.
The stitching process creates thousands of tiny holes along each seam where the needle penetrates the fabric. Without proper sealing, these holes act as entry points for water, turning your protective shelter into a soggy mess during the first serious rainstorm.
2. Prevents Water Through Stitch Holes
Each stitch hole represents a potential leak point. When fabric fibers get wet, they can swell and help block some water penetration, but this natural sealing effect is unreliable and insufficient during heavy precipitation. Professional seam sealing fills these gaps completely, creating a continuous waterproof barrier along every stitched joint.
This protection becomes especially crucial around high-stress areas like corners, door attachments, and guy-line anchor points, where seams experience the most tension and are most likely to develop gaps over time.
3. Extends Tent Lifespan
Water infiltration doesn’t just cause immediate discomfort—it can lead to long-term damage that shortens your tent’s usable life. Moisture trapped within fabric layers can cause delamination of waterproof coatings, promote mold and mildew growth, and weaken the structural integrity of seams.
Properly sealed seams help maintain the tent’s waterproof coating by preventing water from working its way behind protective layers. This proactive maintenance can add years to your tent’s lifespan while maintaining its performance characteristics.
4. Crucial for Wet or Rainy Camping
If you plan to camp during shoulder seasons, in humid climates, or anywhere precipitation is likely, seam sealing becomes non-negotiable. Mountain environments, coastal areas, and forested regions often present challenging weather conditions that will quickly expose any weaknesses in your tent’s waterproofing.
Even morning dew can find its way through unsealed seams, creating moisture problems that affect your comfort and gear. A properly sealed tent provides peace of mind and allows you to focus on enjoying your outdoor experience rather than worrying about staying dry.
How to Seam Seal a Tent (Step-by-Step)

Seam sealing your tent is a simple but essential process to prevent leaks, protect your gear, and extend your tent’s lifespan. Following the right steps ensures reliable waterproofing for any camping adventure.
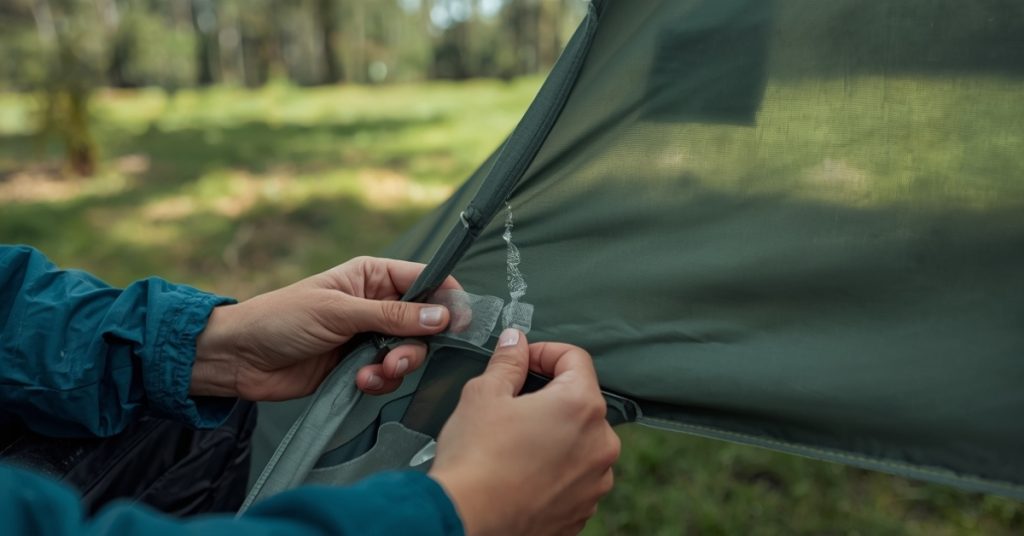
Step 1: Clean Seams Thoroughly
Begin by setting up your tent in a clean, dry area where you’ll have adequate workspace and ventilation. Inspect all seams carefully, looking for dirt, debris, old sealant residue, or any damage that might interfere with proper adhesion.
Use a soft brush or cloth with mild soap and water to clean along all seam lines. Pay special attention to areas where old sealer may be peeling or flaking—these sections need complete removal before applying new sealant. Rinse thoroughly with clean water and allow the tent to dry completely. Any residual moisture will prevent proper bonding of the new sealer.
Step 2: Set Up or Lay Tent Flat
Decide whether to work with the tent set up or laid flat based on your workspace and the tent’s design. Setting up the tent allows easier access to all seam areas and helps you identify which seams are most critical for waterproofing. However, laying the tent flat may be more practical in smaller spaces.
Ensure you can comfortably reach all seam areas without straining or missing sections. Good access prevents incomplete coverage, which can leave vulnerable spots that compromise the entire sealing effort.
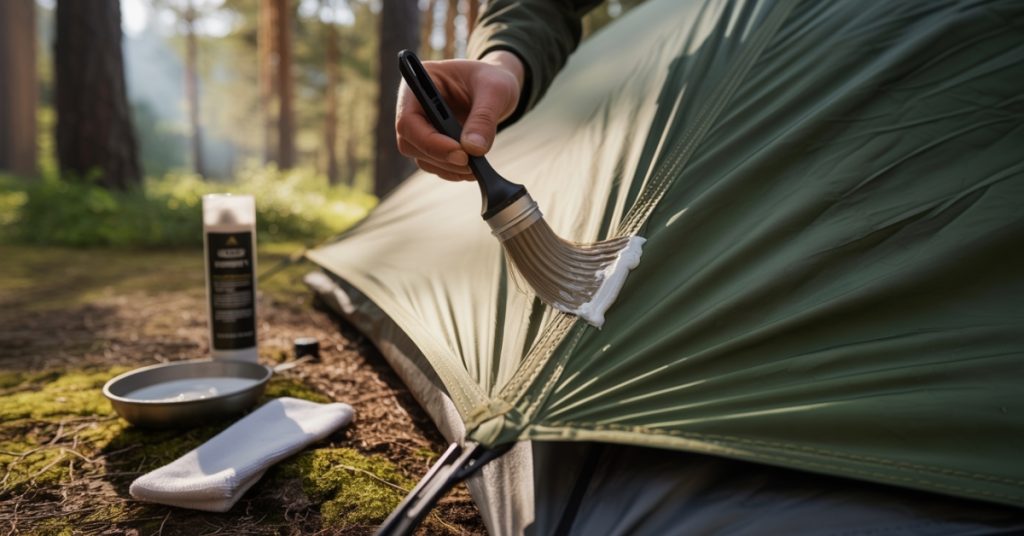
Step 3: Apply Seam Sealer Carefully
Choose an appropriate applicator based on your sealer type—most products come with built-in brush applicators or can be applied using small disposable brushes. Start with the most critical seams: the rainfly’s ridgeline, corners, and any seams that will be directly exposed to rain runoff.
Apply sealer in steady, continuous strokes along the entire length of each seam. Work systematically to avoid missing sections, and maintain consistent pressure to ensure even coverage. The goal is to create a continuous barrier that covers both the stitching line and extends slightly onto the adjacent fabric.
Step 4: Smooth Sealer Evenly
After applying sealer along a seam, use your brush or applicator to smooth the material and ensure complete coverage of all stitch holes. The sealer should flow slightly into the fabric weave while maintaining enough thickness to create an effective barrier.
Look for any thin spots, gaps, or air bubbles that could compromise waterproofing. Address these issues immediately while the sealer remains workable. Proper coverage means you can’t see individual stitch holes through the dried sealer.
Step 5: Let Sealer Dry Completely
Drying times vary significantly based on temperature, humidity, and sealer type—typically ranging from 2-12 hours. Consult your product’s instructions for specific timing, and err on the side of longer drying periods in cool or humid conditions.
Ensure adequate ventilation during the drying process, as most sealers release fumes that can be hazardous in enclosed spaces. Avoid touching or disturbing the seams while they cure, as this can create weak spots or imperfections in the seal.
Step 6: Seal Inside and Outside if Needed
Some tents benefit from sealing both interior and exterior seams, particularly in high-exposure areas or if you frequently camp in severe weather conditions. However, many tents only require exterior sealing, as interior application can sometimes interfere with ventilation or create condensation issues.
Focus additional sealing efforts on areas where you’ve experienced leaks in the past or where water runoff is most likely to pool or flow along seam lines.
Step 7: Test Seams for Leaks
Once the sealer has fully cured, conduct a thorough water test before your next camping trip. Use a garden hose or spray bottle to simulate rain conditions, paying particular attention to newly sealed areas and historically problematic seams.
Look for any water penetration, beading issues, or areas where water seems to follow seam lines. Address any deficiencies immediately with additional sealer application rather than discovering problems during an actual camping trip.
You can also read: How to Fix a Tent Zipper
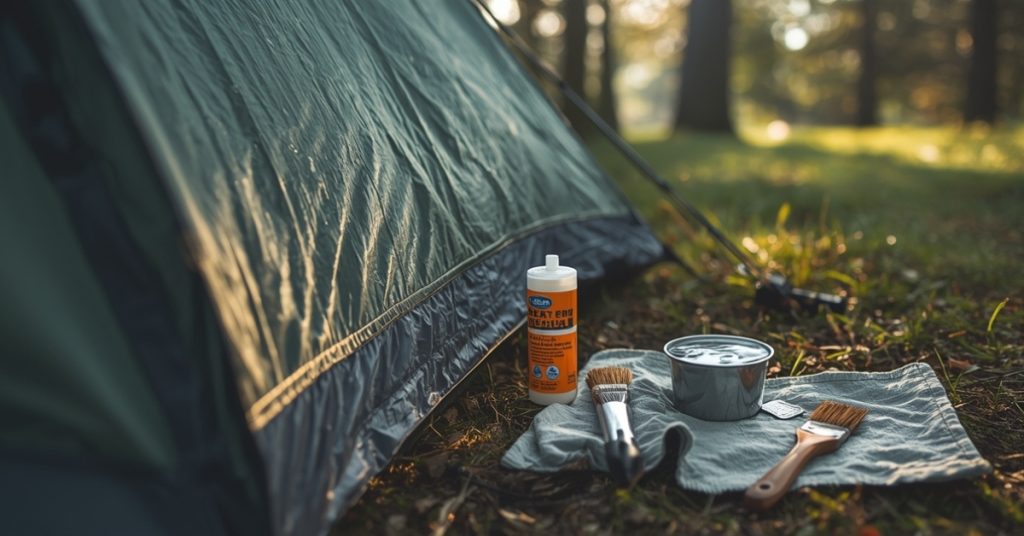
Best Products for Seam Sealing Tents
Choosing the right seam sealer ensures strong, flexible, and reliable waterproofing for your tent. Select products compatible with your tent’s material for long-lasting protection and optimal performance.
Silicone-Based Seam Sealers
Silicone sealers work exceptionally well with silnylon and other silicone-treated fabrics commonly used in ultralight tents. These products typically offer excellent flexibility and durability, maintaining their effectiveness through repeated packing and setup cycles.
Popular silicone-based options include Gear Aid Seam Grip SIL and similar products designed specifically for silicone-treated fabrics. These sealers often require longer cure times but provide superior long-term performance and weather resistance.
Polyurethane Seam Sealers
Polyurethane-based products work well with most tent fabrics and offer good adhesion characteristics with relatively quick cure times. These sealers typically provide excellent water resistance and maintain flexibility across a wide temperature range.
Gear Aid Seam Grip WP and McNett Seam Sure represent quality polyurethane options that have proven effective across various tent materials and camping conditions. These products often include brush applicators for convenient application.
Tubes or Bottles with Brush Applicators
Application method significantly impacts sealing quality, making built-in applicators valuable for achieving consistent results. Look for products that include precision applicator tips or brushes designed for seam work.
Some sealers come in squeeze tubes with fine tips that allow precise application along narrow seam lines, while others include brush applicators that help spread the sealer evenly and work it into fabric fibers.
Cleaning Agents Safe for Tent Fabric
Before sealing, consider using specialized cleaning products designed for technical outdoor fabrics. These cleaners remove oils, dirt, and residues that can interfere with sealer adhesion without damaging waterproof coatings.
Nikwax Tech Wash and similar products clean effectively while preserving fabric treatments. Avoid household detergents or harsh cleaners that may compromise your tent’s waterproof coatings or fabric integrity.
Tips for Effective Seam Sealing
Proper seam sealing keeps your tent fully waterproof, protects your gear, and extends its lifespan. Using the right techniques ensures a reliable, dry shelter in all weather conditions, especially during rainy or humid camping.
1. Work in a Well-Ventilated Area
Most seam sealers contain solvents that produce potentially harmful fumes during application and curing. Set up your workspace outdoors or in a well-ventilated garage or covered area where air circulation prevents fume buildup.
Good ventilation also helps achieve optimal curing conditions, as stagnant air can slow the drying process and potentially affect the final seal quality.
2. Don’t Over-Apply Sealer
Thin, even coats provide better long-term performance than thick applications that may not cure properly or remain flexible. Heavy sealer application can create rigid areas that crack under stress or interfere with the tent’s packing characteristics.
Apply just enough sealer to completely cover the seam and fill stitch holes without creating raised ridges or thick deposits. Multiple thin coats often work better than single heavy applications for challenging seams.
3. Seal Seams Annually or Before Rainy Trips
Regular maintenance prevents small sealing issues from becoming major problems during critical camping situations. Annual sealing, or pre-trip sealing before extended expeditions, ensures your tent provides reliable protection when you need it most.
Keep a small tube of sealer in your camping gear for emergency field repairs, as seams can develop small leaks during extended trips due to stress or wear.
4. Check and Touch Up Seams Regularly
Inspect your tent’s seams before and after each camping season, looking for signs of sealer degradation, small leaks, or stress damage. Early detection allows simple touch-up repairs rather than complete re-sealing projects.
Pay particular attention to high-stress areas like corners and guy-line attachment points, where seams experience the most tension and are most likely to develop problems over time.
5. Use Products Compatible with Your Tent’s Fabric Material
Different tent fabrics require specific sealer types for optimal performance and compatibility. Using incompatible products can result in poor adhesion, fabric damage, or sealing failure when you most need protection.
Check your tent’s documentation or contact the manufacturer if you’re unsure about fabric type or sealer compatibility. When in doubt, test any sealer on a small, inconspicuous area before proceeding with full seam treatment.
Final Verdict
Seam sealing isn’t just routine maintenance—it’s essential for a fully waterproof tent and a comfortable, worry-free camping experience. By thoroughly cleaning, sealing, and inspecting your tent’s seams, you prevent leaks, extend its lifespan, and protect your gear investment. Using high-quality sealers and proper techniques ensures every stitch line forms a reliable barrier against water, even in heavy rain or harsh conditions.
Whether you’re heading out for a weekend trip, an extended backcountry adventure, or camping in unpredictable weather, making seam sealing a regular part of your tent care routine keeps your gear performing like new, providing confidence, peace of mind, and dry, comfortable nights outdoors with minimal effort.
Frequently Asked Questions
1. How often should I seam seal my tent?
Most tents benefit from annual seam sealing or before extended trips in wet conditions. Tents used frequently or stored in hot, humid areas may need it more often, while tents used occasionally in good storage may go 2–3 years between treatments.
2. Can I seam seal a tent myself?
Yes, seam sealing is a DIY-friendly task that most campers can handle with basic care. Professionals are usually only needed for expensive expedition tents or if you’re uncomfortable handling the materials.
3. Will seam sealer damage my tent fabric?
No, if you use a product designed for your tent’s materials and apply it on clean, dry fabric. Using incompatible sealers or applying to wet/dirty fabric can cause issues. Test on a small area if unsure.
4. Can I use regular waterproof spray instead of seam sealer?
No. Regular sprays treat fabric but won’t protect stitching and seam lines. Use products specifically formulated for seam sealing to ensure reliable protection.
5. How long does seam sealer take to dry?
Cure time varies from 2–12 hours depending on the sealer type, temperature, humidity, and ventilation. Silicone-based sealers usually take longer than polyurethane ones. Always follow the manufacturer’s instructions and allow extra time in cool or humid conditions.
As an Amazon Associate, I earn from qualifying purchases.